[mario@localhost]$ terraform --versionTerraform + KVM
Terraform/KVM/libvirt
Terraform is a tool for provisioning,
and managing infrastructure. It describes a given infrastructure
as code, maintains the state of the infrastructure described so
that an administrator can manage it, adding, removing or updating
resources. One of the things I like the most about Hashicorp is that all its
products are one executable binary in Linux. That makes incredibly
easy to start using them. In this case I just had to download the tar.gz file containing
the executable, put the executable in my shell PATH, and checking
that it works just executing in my shell:
KVM or Kernel Virtual Machine is a virtualization environment consisting on a Linux Kernel module capable of providing a virtualization infrastructure. You have to check how to install KVM in your Linux distribution, in Fedora 30 is as easy as executing:
[mario@localhost]$ sudo dnf install @virtualizationThe @virtualization alias is just an aggregation of the required
packages to start using KVM in your local machine. You can check
which packages are included by executing:
[mario@localhost]$ dnf group info virtualizationLibvirt is a virtualization API, meaning an API able to interact with different virtualization environments such as KVM, Xen…
Terraform libvirt provider
Most of the time Terraform is well known for using it in cloud environments such as AWS, Azure, Alibaba… but the truth is that it has integrations with more than 90 types of environments thanks to Terraform’s providers. Unfortunately among those official providers there’s none for KVM. But don’t worry there’s an amazing project providing us with the provider we need.
Terraform libvirt provider as its Github repository says is: "Terraform provider to provision infrastructure with Linux’s KVM using libvirt".
| Nowadays because Terraform libvirt provider is not an official provider it’s to be installed manually in your system. The last release has binaries for some Linux distributions. Anyway you can always build it from source and then install the resulting binary which happens to be what I did. |
Hello KVM
The first Terraform file just creates a Debian 10 VM in
my local KVM. The image is a qcow2 image file created with
Packer another Hashicorp tool
for creating images (not only VMs but also Docker images as well). A simple Terraform template contains providers and resources:
-
A provider is an abstraction over the final environment, and
-
A resource is a part of the infrastructure we want to create.
sample structure
provider "libvirt" { (1)
    ...
}

resource "libvirt_volume" "os_image" { (2)
    ...
}

resource "libvirt_domain" "new_vm" { (3)
    ...
}| 1 | The provider for dealing with libvirt compatible environments |
| 2 | A resource representing a volume in a VM |
| 3 | A resource representing the VM we want to create |
Lets see a real example creating a Debian 10 VM in my local KVM environment.
hello_world.tf
provider "libvirt" { (1)
  uri = "qemu:///system"
}

resource "libvirt_volume" "os_image" { (2)
  name   = "os_image"
  pool   = "default"
  source = "/home/mario/Development/devops/hashicorp-tools/packer/out/packer-buster"
}

resource "libvirt_domain" "new_vm" { (3)
  name   = "postgres"
  memory = "1024"
  vcpu   = "2"

  disk {
    volume_id = "${libvirt_volume.os_image.id}"
  }

  network_interface {
    hostname = "postgresvm"
  }

  graphics {
    listen_type = "address"
  }

  console {
    type        = "pty"
    target_port = "0"
    target_type = "virtio"
  }
}| 1 | Declaring the provider: There provider knows about the underlying infrastructure. In this case, because we’re creating VMs in an libvirt compatible environment, we’re using the libvirt provider. This time is pointing to my local environment. |
| 2 | Declaring which image to use: The base of the VM created in the infrastructure is going to be a Debian 10. The image can be created in several ways. I’ve created mine using Hashicorp’s Packer. |
| 3 | Describing how everything stick together: Once I’ve described the different resources that I’m going to use, I should create a domain resource. The domain glues all the previous resources. |
Before doing anything we need to init the project. This is required because Terraform checks whether it has the providers required to accomplish the plan:
[mario@localhost]$ terraform init

Initializing the backend...

Initializing provider plugins...

Terraform has been successfully initialized!

You may now begin working with Terraform. Try running "terraform plan" to see
any changes that are required for your infrastructure. All Terraform commands
should now work.

If you ever set or change modules or backend configuration for Terraform,
rerun this command to reinitialize your working directory. If you forget, other
commands will detect it and remind you to do so if necessary.
Then, altough is not mandatory, but in order to keep all templates with the same format I like to pass the formatter. This will format all Terraform files found in the current directory.
[mario@localhost]$ terraform fmtBefore executing the terraform plan, I can validate the template:
[mario@localhost]$ terraform validateFinally we can execute our plan:
[mario@localhost]$ terraform apply
An execution plan has been generated and is shown below.
Resource actions are indicated with the following symbols:
+ create
Terraform will perform the following actions:
# libvirt_domain.new_vm will be created
+ resource "libvirt_domain" "new_vm" {
+ arch = (known after apply)
+ emulator = (known after apply)
+ fw_cfg_name = "opt/com.coreos/config"
...
Plan: 2 to add, 0 to change, 0 to destroy.
Do you want to perform these actions?
Terraform will perform the actions described above.
Only 'yes' will be accepted to approve.
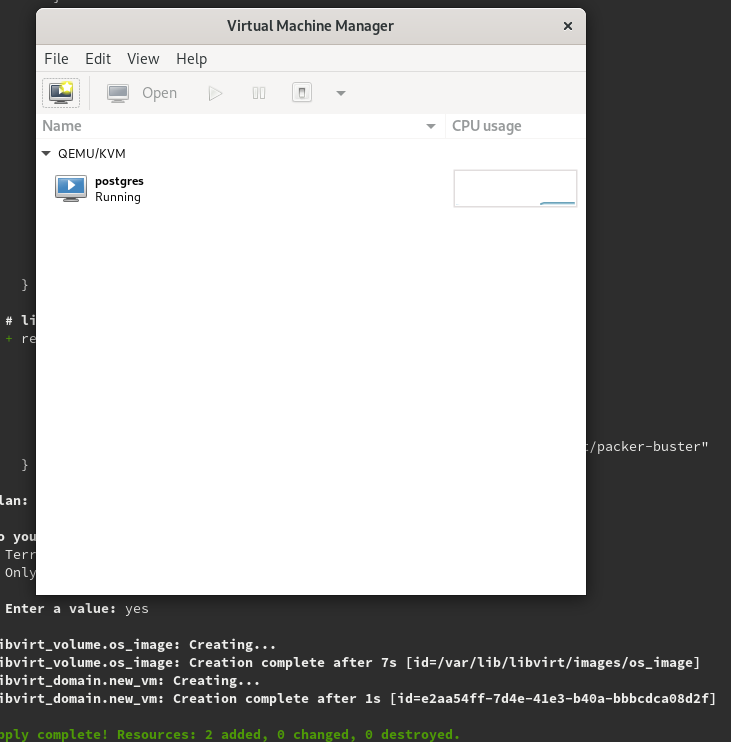
Enter a value:The apply command shows you the resources it’s going to apply and requires from you to confirm before going any further. Only if you write yes will continue. You can then check that the VM is up and running. I’d normally open the Virtual Machine Manager desktop app.
At this point Terraform updates the state of your infrastructure so that if wanted to destroy everything it knows what to do:
[mario@localhost]$ terraform destroyAfter confirming again that you want to destroy your infrastructure Terraform will take over and destroy it.
Variables
At some point we may like to reuse our templates. A first step could be setting some variables in the template and passing their values when executing the plan. We can change our initial template and declare some variables:
hello_world.tf
variable "kvm_destination_uri" {
  type        = string
  description = "kvm instance uri where the vm is going to be deployed"
}

variable "hostname" {
  type        = string
  description = "hostname of the vm"
}

variable "memory" {
  type        = string
  description = "amount of memory"
}

variable "image_path" {
  type        = string
  description = "where is located the qcow2 image"
}
Once we have declared the variables we can substitue the literals
by the variables. You only have to add the prefix var. and the
name of the variable in the part of the template you want to use it.
hello_world.tf
provider "libvirt" {
  uri = var.kvm_destination_uri
}

resource "libvirt_volume" "os_image" {
  name   = "os_image"
  pool   = "default"
  source = var.image_path
}

resource "libvirt_domain" "new_vm" {
  name   = var.hostname
  memory = var.memory
  vcpu   = "2"

  disk {
    volume_id = "${libvirt_volume.os_image.id}"
  }

  network_interface {
    hostname = var.hostname
  }
}
Finally you can execute your plan and pass the variables along with the command. Here for example we would like to create a VM in a remote KVM host.
passing variables values to terraform apply
[mario@localhost]$ terraform apply \
    -var="kvm_destination_uri=qemu+ssh:root@my.cloud.example.com/system" \
    -var="hostname=firewall" \
    -var="memory=1024" \
    -var="image_path=/tmp/myimage.qcow2"
Or writing those key=value in a variables file:
hello_world.tfvars
kvm_destination_uri="qemu+ssh:root@my.cloud.example.com/system"
hostname="firewall"
memory="1024"
image_path="/tmp/myimage.qcow2"
And pass the file name to the Terraform apply command:
passing variables filename to terraform apply
terraform apply -var-file=hello_world.tfvars| If you don’t pass the variables to the command line nor passing a variables file, still Terraform could prompt you to give it the values for the required variables. |
Modules
One step further when reusing our templates is to create modules. A module represents a set of resources and variables that are meant to be used together. The basic structure of a module directory is to have three files: -
-
main.tf: where the resources are declared -
variables.tf: where the variables are declared -
outputs.tf: where the output variables are declared
Please notice that variables.tf is where the definition of the
variables are declared, not the values, that, again could be
in a different file .tfvars.
I’m creating the following folder structure:
+---modules
       +-----debian (module)
       |        +-----main.tf
       |        |
       |        +-----variables.tf
       |
+-----myplan.tf-
This structure modules/debian represents a module called debian.
-
The Terraform plan myplan.tf will be reusing the debian module.
In order to follow using the previous example:
-
Split the previous version of the terraform file hello_world_variables.tf
-
Put the variables in the variables.tf
-
Put the resource declaration in the main.tf.
-
These two files will be located at modules/debian
variables.tf
variable "kvm_destination_uri" {
  type        = string
  description = "kvm instance uri where the vm is going to be deployed"
}

variable "hostname" {
  type        = string
  description = "hostname of the vm"
}

variable "memory" {
  type        = string
  description = "amount of memory"
}

variable "bridge_name" {
  type        = string
  description = "name of the bridge configured in the host"
}

variable "cpu_count" {
  type        = string
  description = "number of cpus used by vm"
}

variable "os_image" {
  type        = string
  description = "name of the vm volume"
}

variable "image_source_path" {
  type        = string
  description = "qcow2 image path"
}
main.tf
provider "libvirt" {
  uri = var.kvm_destination_uri
}

resource "libvirt_volume" "os_image" {
  name   = "os_image${var.os_image}"
  pool   = "default"
  source = var.image_source_path
}

resource "libvirt_domain" "new_vm" {
  name   = var.hostname
  memory = var.memory
  vcpu   = var.cpu_count

  disk {
    volume_id = "${libvirt_volume.os_image.id}"
  }

  network_interface {
    hostname = var.hostname
    bridge   = var.bridge_name
  }

  graphics {
    listen_type = "address"
  }

  console {
    type        = "pty"
    target_port = "0"
    target_type = "virtio"
  }
}
Finally I can reference the debian module in my new plan overriding any declared variable in the module.
myplan.tf
module "k8s_master" {
  source = "./debian"

  kvm_destination_uri = "qemu+ssh://maintainer@future/system"
  image_source_path   = pathexpand("~/Development/devops/hashicorp-tools/packer/out/packer-buster")
  hostname            = "k8s_master"
  memory              = "2048"
  cpu_count           = "2"
  bridge_name         = "br0"
  os_image            = "master_volume"
}
References
Terraform
-
I’d recommend you to start checking the getting started guide
-
Dealing with input variables
-
How to create modules
Terraform libvirt provider
-
Official repository and docs at Github
KVM
-
Check the Fedora virtualization guide at Fedora virtualization guide